Saturday, May 19, 2012

Wonderberry

A few years ago, while shopping in my one of my favorite yarn stores in Denver, The Fancy Tiger, I came across a display of Baker Creek seed
http://rareseeds.com/wonderberry.htm
Such a pretty old fashion package.  I have a hard enough time resisting yarns, but I never meet a seed I didn't like.  I found a packet called Wonderberry, an heirloom berry that was supposedly easy to grow and could be used in cooking in place of blueberries.
Now I have heard it rumored that there are people who can grow blueberries here in Denver at over 5000 feet of elevation with just slightly more rain then the Sahara desert, but I am not one of those people.  I was willing to try a blueberry substitute. And I love the romantic idea of heirlooms.
The instructions said to start the seeds like tomatoes, so I did, and they were very easy.  Because of my limited space, I planted only 2 plants, squeezed in between tomatoes.  Those babies took off, they grew enormously, they had a small white flower the bees went nuts for and a dark shiny berry.  While the fruit couldn't compare to a blueberry, it was pleasant enough and I love having fruit that we can pick and eat right from the vine, or in this case, plant.
I found some recipes for jams, syrups, and pies.  I think they're a little runny for jam, but I liked this recipe for a Wonderberry ginger syrup, great over pancakes, I even served it over pork loin.
Since I had only a small batch I made it as a refrigerator syrup.


1 cup of Wonderberries
1/2 cup of sugar
1 teaspoon of fresh grated ginger
1 teaspoon of lemon
dash of salt 


Cool the berries, sugar, salt and ginger over medium heat for 10-12 minutes.  Let cool, add lemon and place into sterilized jar.


 *You must make certain not to eat the green berries as they are poisonous.


The best part of this plant is that it has reseeded it self over the last few years,  although this year I see it is having a hard time competing with the raspberries that seem to be taking over everything.     


http://rareseeds.com/wonderberry.html

How to build a Bean teepee

We got the idea for a bean teepee a few years ago after reading Root, Shoots, Buckets and Boots, a magical book full of gardening projects to do with kids. Since we had had recently moved to Denver from Tucson Arizona, I was lamenting the lack of shade in the yard.  Perfect for growing vegetables, not perfect for growing boys. So instead of a tree house retreat for the boys we decided to seize what little grass we had remaining (I had already usurped most of the backyard lawn to make more room for my raised beds) and plant a bean teepee, or this case a gourd/bean teepee.


I had my doubts that these 8 poles and a handful of seeds would amount to much in the way of a shade structure, but I got out my pick ax and dug out a foot wide circle, about 12 inches deep, emptied a bag of compost and pushed in the seeds.  The north side is the entrance and you leave some space.  My friend Jill, who is somewhat of an expert on bean teepees and other creative things to do with kids, had suggested the gourds seeds for better coverage.

(That's Lancelot and Batman hiding out in a the bat cave in case you were wondering)


She wasn't kidding about the gourds. The beans got a little lost in those Little- Shop-of-Horrors-ish gourds, but we weren't really planting them for food.  You can see a few scarlet runner bean flowers struggling to get sun at the top.  There are some sunflower seeds thrown in for good measure. 
I would advise trimming back some.  In this last photo the kids can't even get through the tangled entrance and started joking that the gourds were trying to strangle them. 
We dried the gourds, painted them and made bird feeders,  The squirrels gnawed on them almost immediately but it was still a lot of fun.

Friday, May 18, 2012

4 little chicks


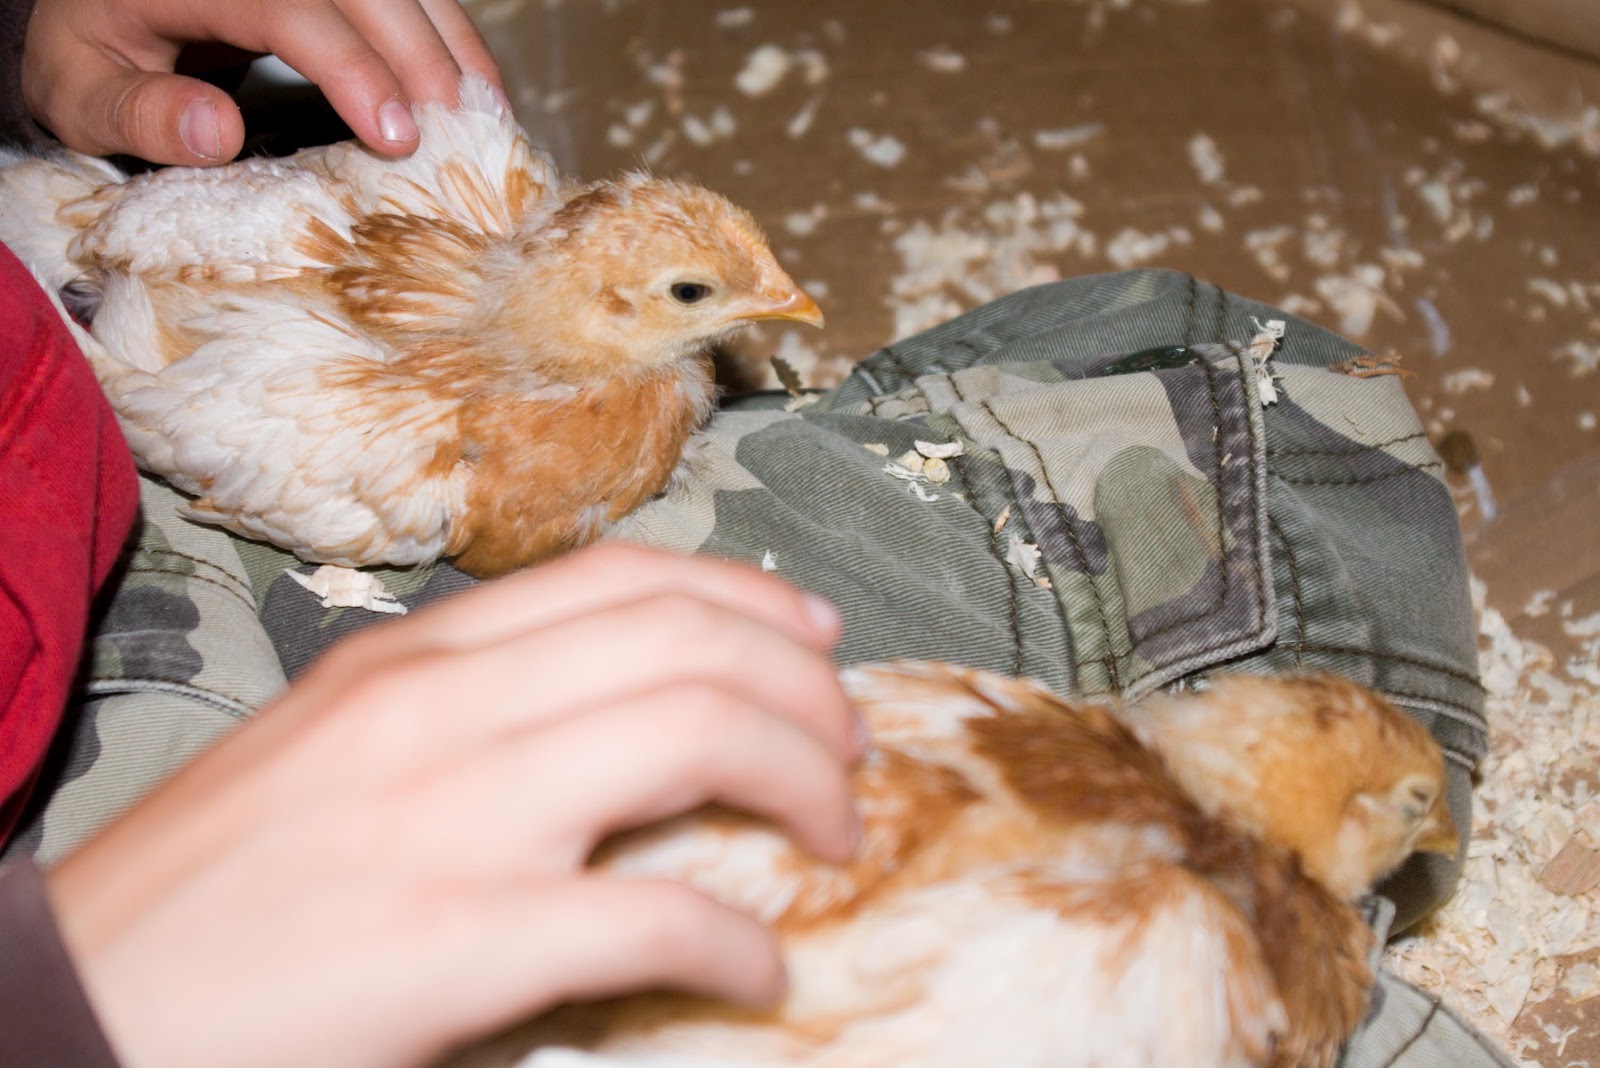
We have had the chicks for one week and thanks to the warm weather they have been outside most of the day and inside in a small box in our bathroom during the night,  This actually works well, they sleep all clumped up together anyway.
They really like being out in the chicken yard.  They are separated from our only remaining hen Ruby, by chicken fabric, but almost immediately they found a small opening, scurried under and it and then ran wild around a disapproving Ruby who clucked and occasionally lunged but did not do any real pecking.  She reminds me of some cartoon character, Big Mama, I can almost see her wearing an apron, running after the chicks.
They are about 4 1/2 weeks and haven't yet entered the awkward stage.  They are so cute and seem to think humans are their roosting posts and will jump on any available surface!  

Ruby takes a break from nannying those pesky chicks.


Thursday, May 17, 2012

Don't forget the honey comb...

If the mere perfection of those tiny little hexagons doesn't blow you away, how about the hundreds of cool things you can do with it?  
Here is a list of just some:  
waxing string to make it stronger, or lubricate your fishing lines with it, make clean burning candles, use it to fix a stuck window, use it as a natural polish for wood, make lotions, salves and lip balms with it.  Place whole hunks of it your honey jars to make fabulous chunk honey (then chew it right out of the jar, mmm)
I saved my comb from last year (after rinsing it out well and placing it in a plastic bag) and this year after harvesting more, I have delved into the alchemy portion of beekeeping and I love it!  
I bought some essential oils for fragrance, coconut oil (used in most of the lotions and balms) and olive oil (just for lotion) and set to work.  I highly recommend purchasing an old pot or even used crock pot for melting the wax.  It is messy, though not as messy as processing the honey.  
Remember wax has a low flash point and can ignite of heated too enthusiastically.  I tried a few different methods but I think melting the wax in water and then letting it cool works best.  You just lift the hunk of wax off floating on top


I cut into this before taking a picture unfortunately.


Here are some photos of the products I've made so far.  This lotion that is amazing!


and a lip balm that keeps you lips soft for hours!


I got the cute little tins as well as the essential oils at Apothecary Tinctura here in Denver.

I will post the recipes tomorrow.


Another hive inspection


Yesterday before work, I did a quick inspection of the hive.  (who am I kidding, it wasn't quick, but at least I didn't kill hundreds of bees)
I try to go into the hive early, at around nine.  I am getting more comfortable with the whole thing but still have a smidgen of adrenaline while inspecting.  I took my time, use my new beehive tool (the best piece of equipment I could have bought).  I spent 25.00 on one initially and it is too wide to fit between the spacer of the top bar and the edge is not sharp enough to cut through the comb attachments. (The tool I love is the backyard hive tool  at http://www.backyardhive.com/General/General/BackYardHive_Beekeeping_Shop/)

I had a plan when I started, I was going to just harvest the last bar, but when I went in, I realized the last bar was a bar from up front that we had repositioned 2 weeks ago when I went in with my husband and we tried to straighten out all the crooked comb.  I don't like disrupting the bees, I don't use smoke and I firmly believe that my bees did so well last year because of my hands off approach.  That said, I do need to keep the bars straight at least.  They are better, but still crooked.  I have not gotten to the crux of the problem, the 2 bars next to the brood comb, so that is my goal by end of summer.


I saw brood, so I think I have a healthy queen, I harvested a small bit of comb that was very new with uncapped honey only because it seemed all the rest had brood mixed in at the bottom
 of the comb.  Corwin, the bee guru from Backyard Hives says if the brood is all down low on the combs, it can be a sign of the hive being hot so they are keeping brood down low, 


One of the bars close to then back (a bar which we moved 2 weeks ago) appeared to be old brood comb now with uncapped honey


Those are not larvae above, just the reflection form the camera flash!

 
 I am not sure I did the correct thing, but I want to make more room for brood, they seem pretty crowed and I found more queen cells.  I am hoping they don't swarm again, and by making room near (unfortunately I have not gotten next to) the brood comb they will hang around longer.
 

Tuesday, May 15, 2012

Monday, May 14, 2012

Baby chicks


Maybe it was the eerily quiet hour that occurred Friday after the kids went to school. I don't work Fridays, my summer veggies were all tucked snugly in their beds, and the rain negated the need of my usual watering ritual.  We were down to only 2 hens since we lost Hazel a few days ago. With my usual act now think later attitude, I called a number on Craigslist and the next thing you know, we were proud owners of 4 baby chicks.


Who cares if our second bathroom is now home to 4 stinky little poop-machines who need a space heater and protection from the wily cat and probably the dog? 


Today the temperatures finally warmed and the little girls were introduced to the chicken yard.  But because they are so small, we are keeping them separated from the big girls by that chicken cloth seen below.  I didn't think our sweet older hens would be anything but cordial to the little chicks.  They have always behaved with impeccable manners, but I was wrong.  This little gal managed to wriggle her way to the other side of the fence and was met angry peck on the head from Lucy.  She practically picked her up she pecked her so hard. 

 
 Ruby. our darkest red hen clucked and crowed like a rooster she was so disturbed by their presence.  I tried all my old standbys to quiet her, threw her some scratch, then I tried some lettuce, then dug a shallow hole so she could scratch for worms, (this has always worked when all else fails, but not today)  Finally I squirt her with a hose to quiet her down, but she got the point.


I was beginning to wonder if this whole baby chick thing was worth it, why I hadn't just purchased hens who ready to lay, when Asher, sitting with 2 chicks on his lap, turned to me and said "this is one of the best days of my life".  
OK, it's worth it.